

Step 1
Register for an account. If you have already registered, skip to step 2.
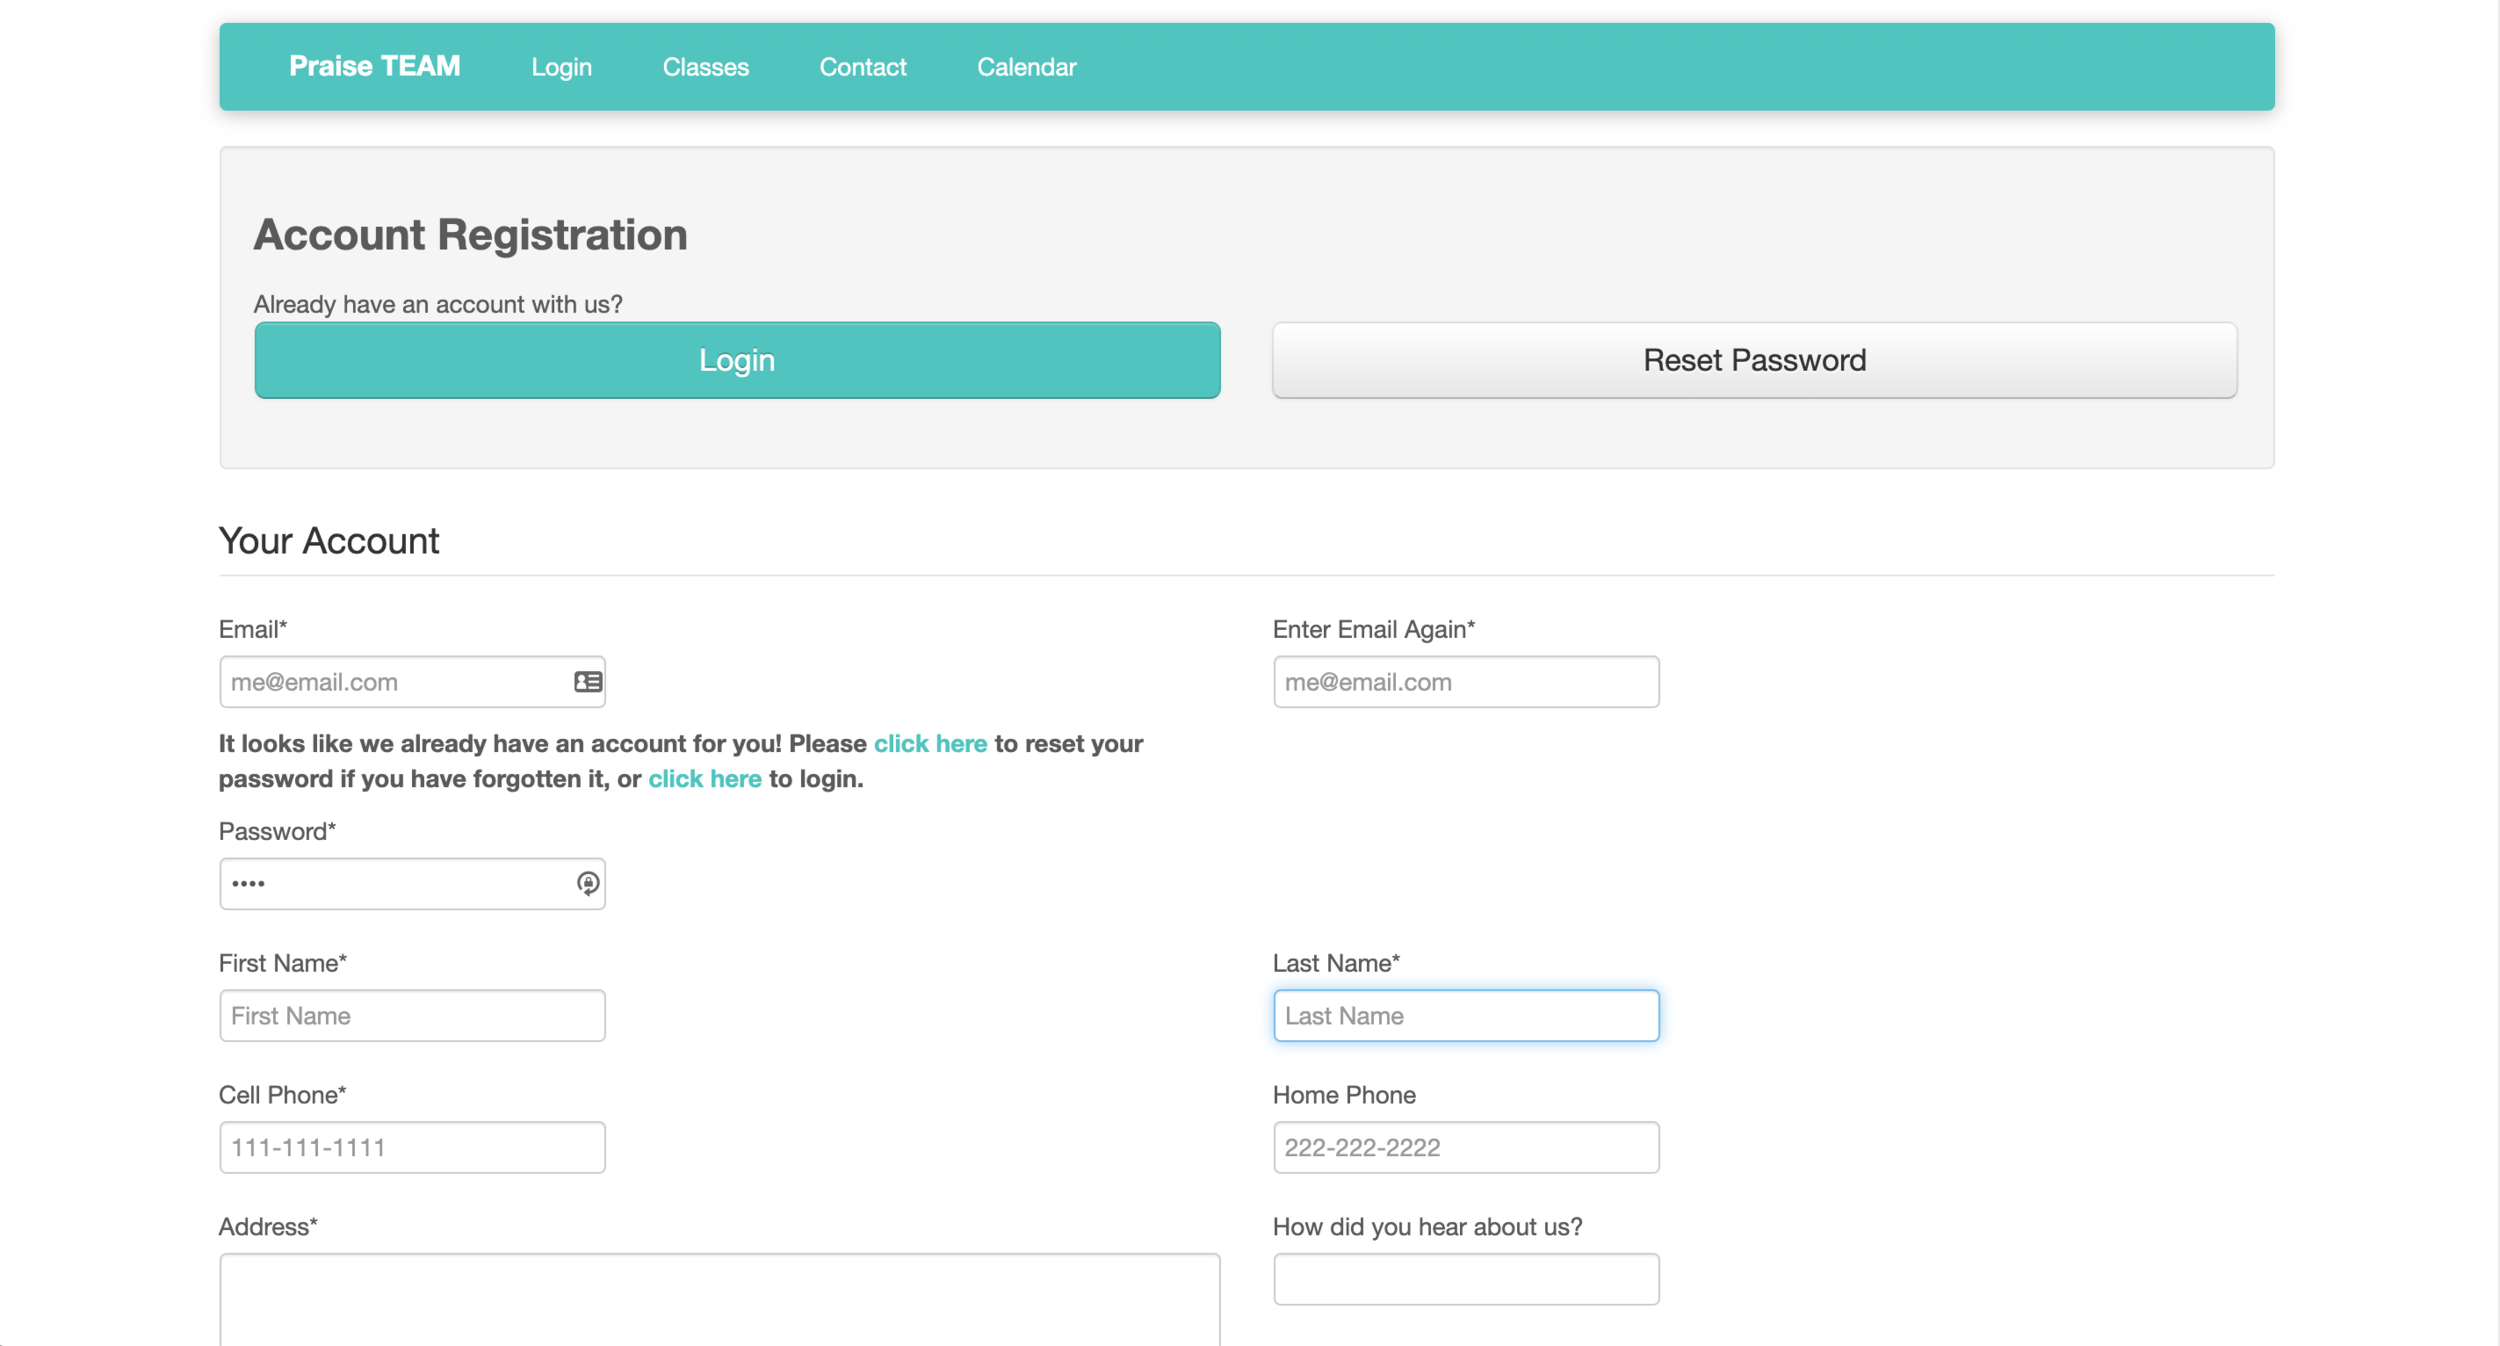
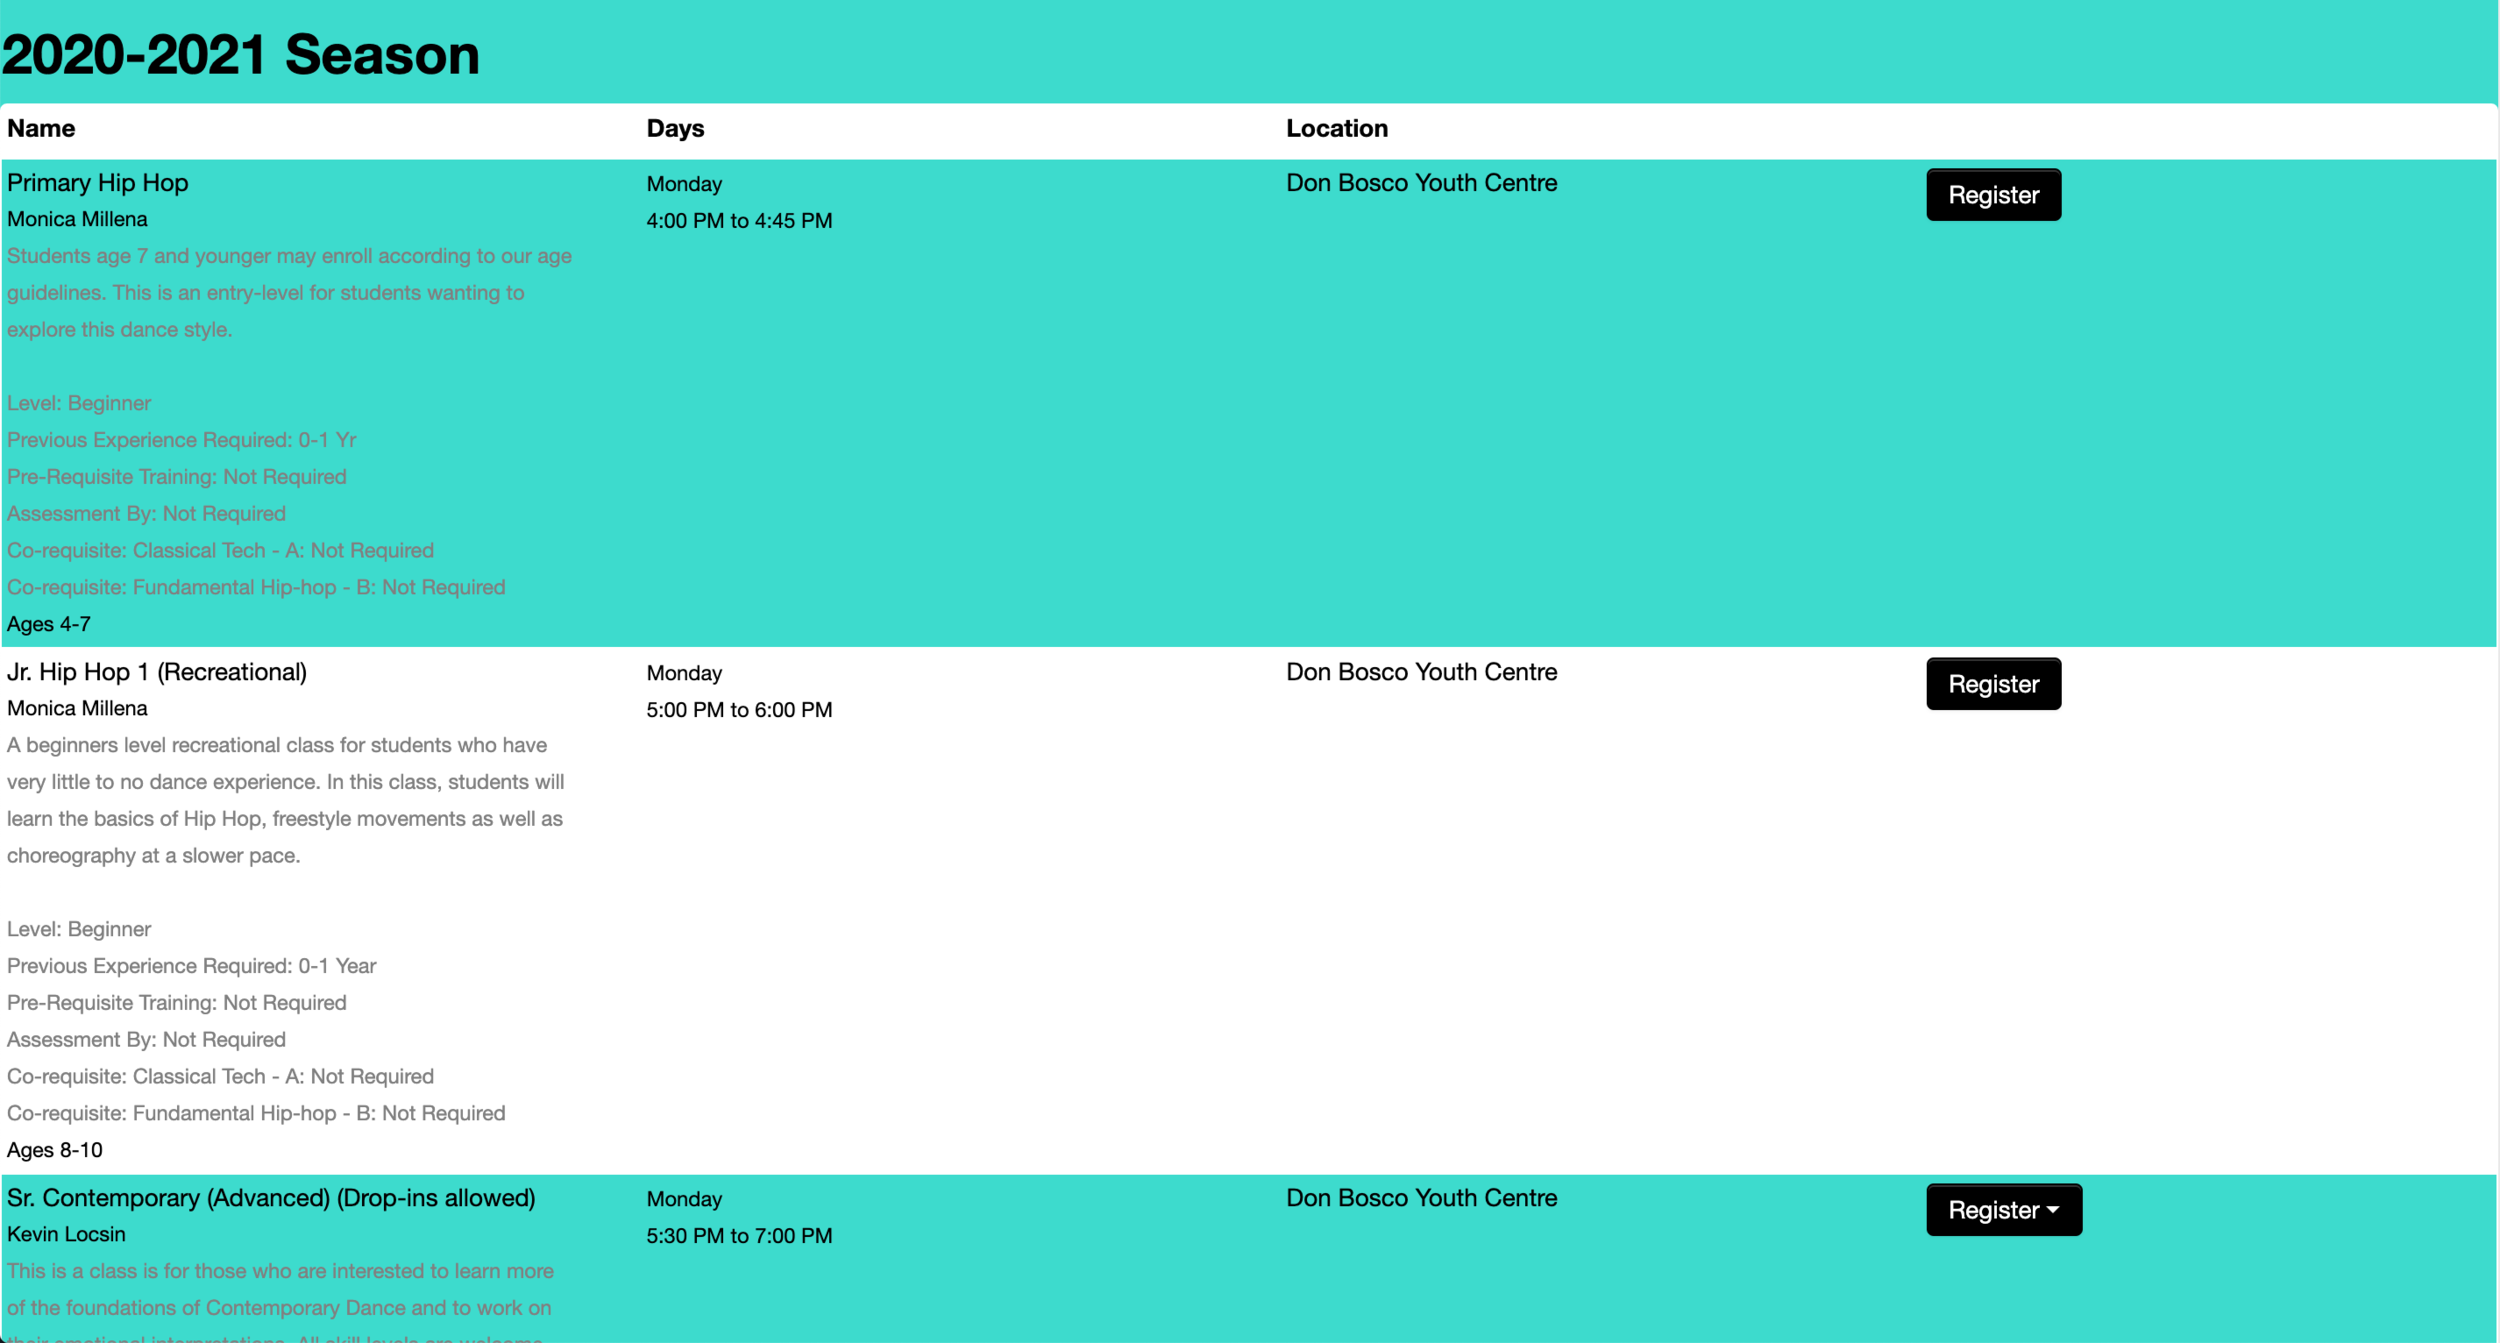
Step 2
Browse our classes and click “Register” on the first desired class.
Step 3
If not signed in, you will be prompted to do so. Please sign in with your registered account. Otherwise, create your account so that you can continue

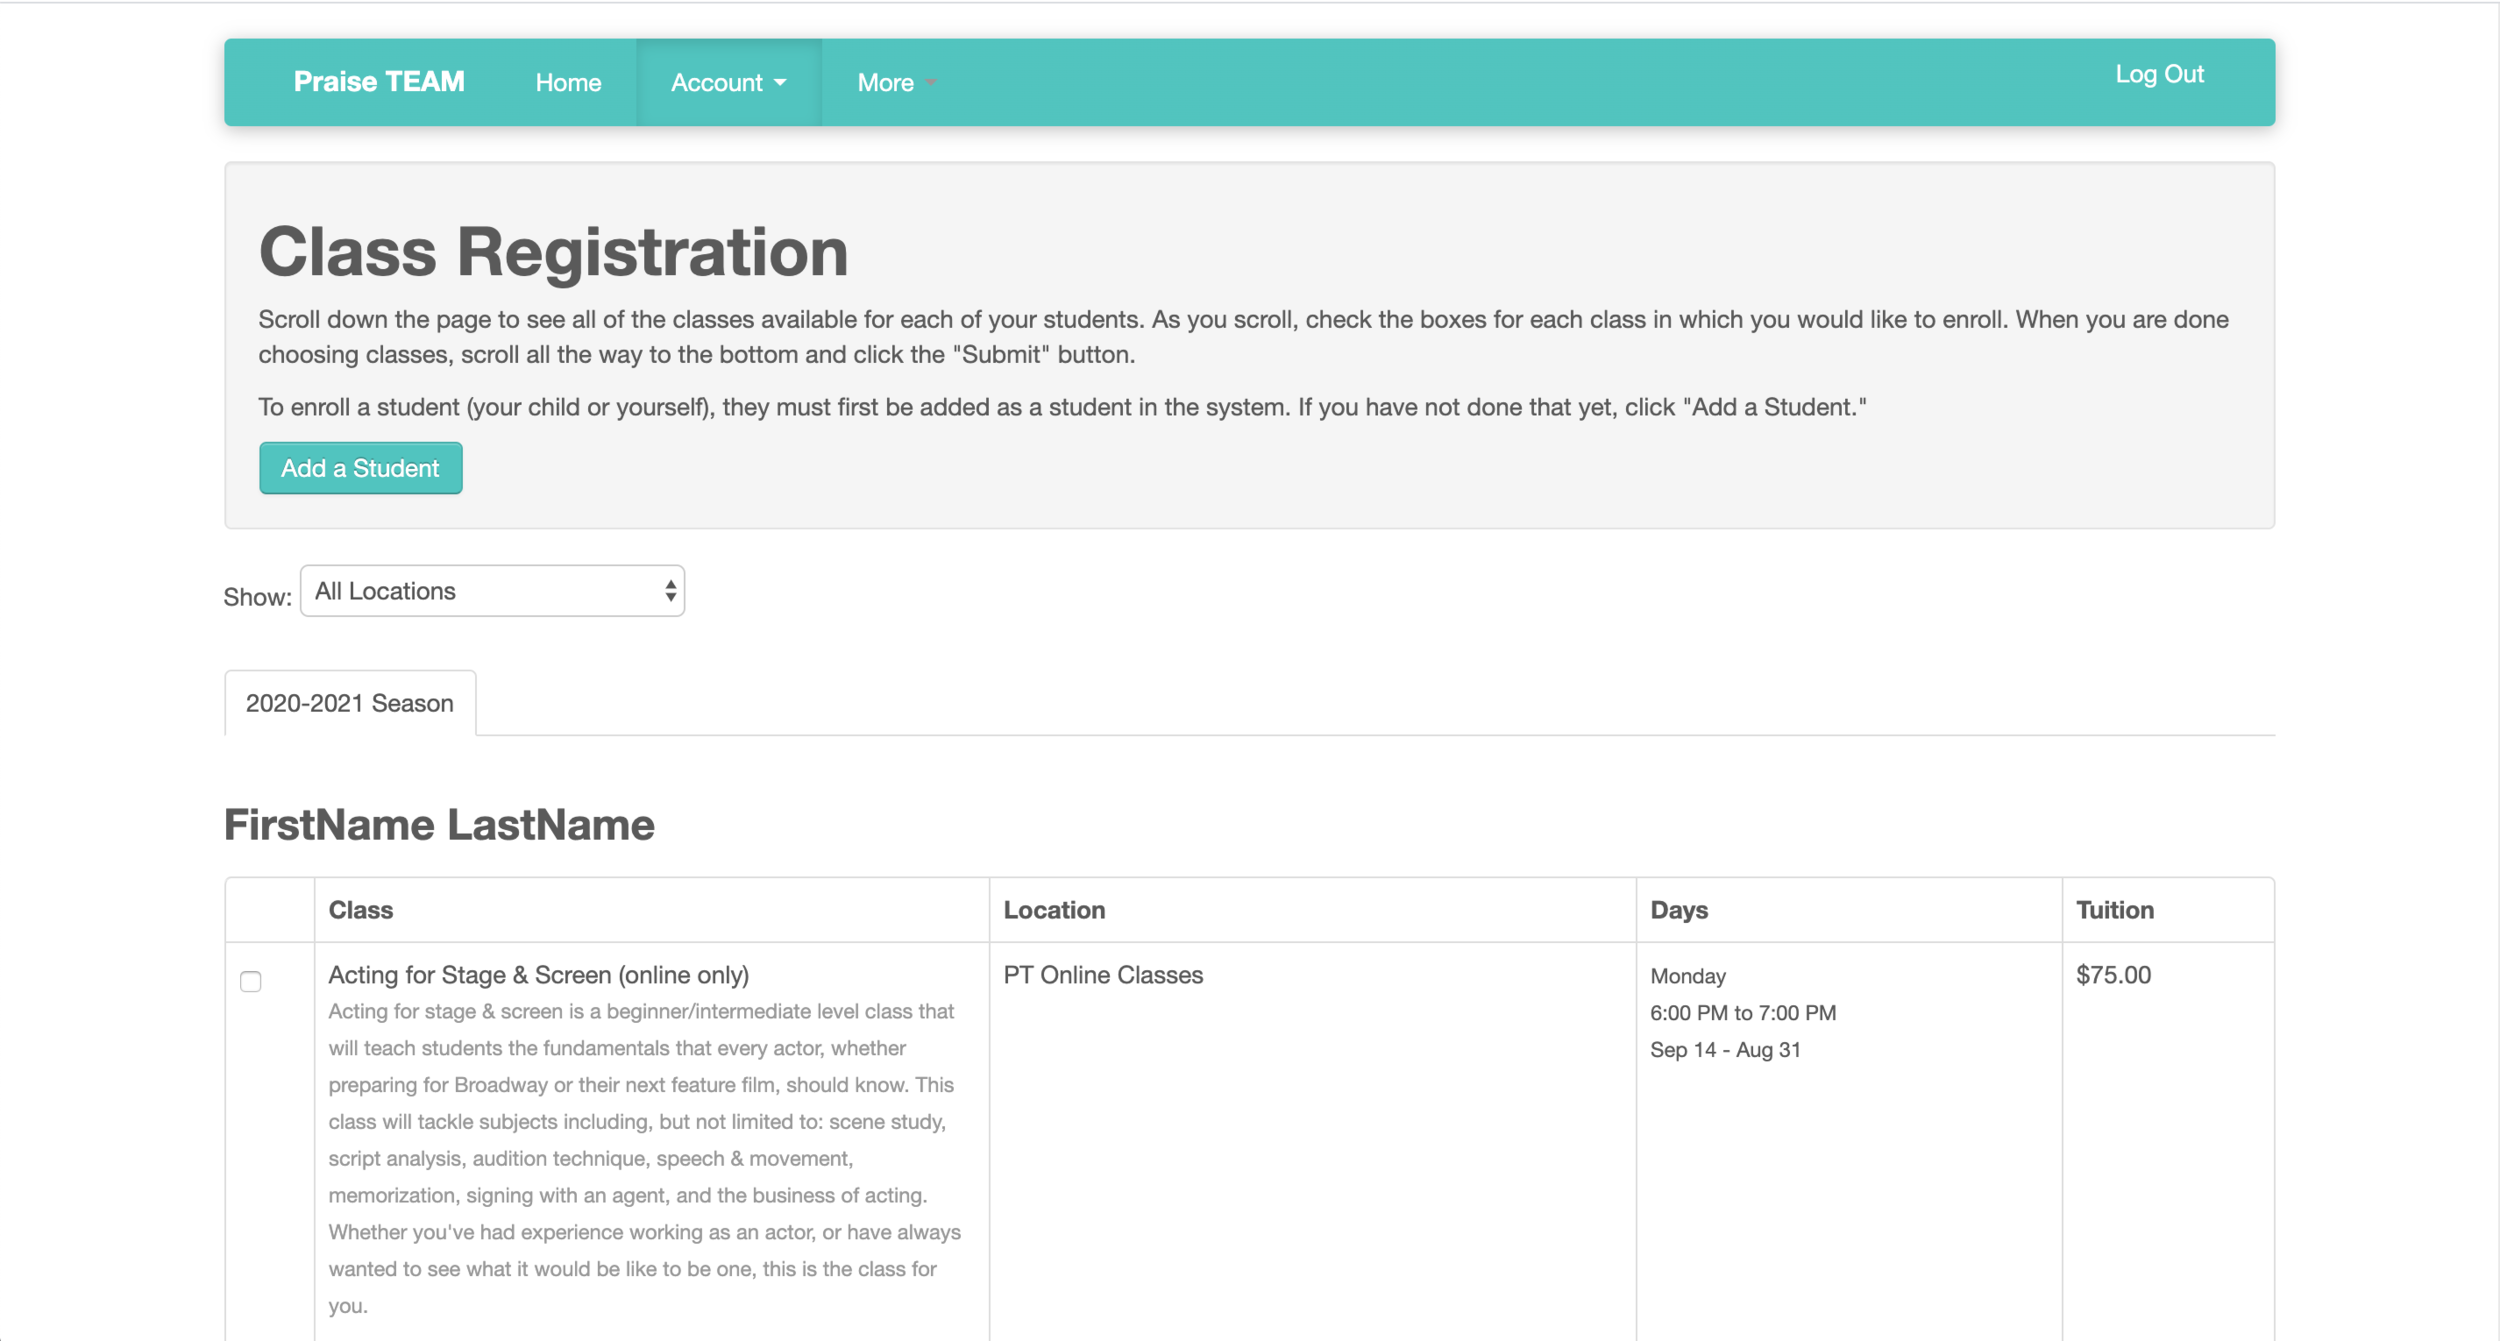
Step 4
You will be redirected to the class registration page. The first class you clicked “Register” on will be preselected.
Please add all students within your family to your account by clicking “Add Student”.
Please select any other classes you wish to register for. You will only see classes that fit within the age range of the students under your account. Once all classes are selected, scroll to the bottom of the page, and click “Submit”.
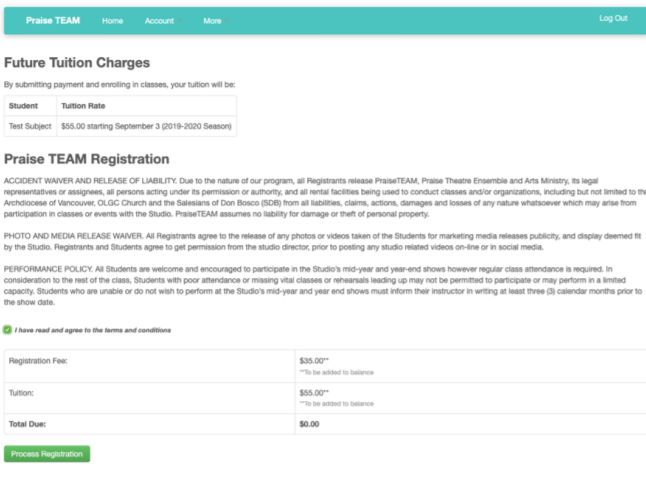
Step 5
You will be directed to this page that shows your order. There are also important terms and conditions that must be read carefully. Once read through, click on the check box claiming that you have read the terms and conditions and click on ‘Process Registration’.
Step 6
To make payments on classes, go back to the homepage and click on ‘Make Online payment.’

Step 7
This page shows your balance owing. To pay for your current dues, click on the appropriate radio button under ‘Online Payment’ and click ‘Next.’

Step 8
An online transaction screen will show up, where you can enter your email and credit card information. Once completed, click on the blue button to process your payment.
Step 9
You will receive an email confirming the payment. To view your receipt, go back to the homepage and click on ‘Make Online payment.’ Your statement can be located by clicking ‘View’ for the appropriate student.